In this tutorial I will walk you through the steps to set up and secure PBX in a Flash on a DigitalOcean droplet. These instructions have been tested. However, use at your own risk. They can also be used on dedicated servers and any KVM- or Xen-based VPS with freshly installed CentOS 6.
DEPRECATION NOTICE: PBX in a Flash 3 is DEPRECATED as of 2017. Instructions in this article may no longer work. For the latest developments in PBX in a Flash, see the official website, PIAF@SourceForge and Nerd Vittles.
Introduction

"PBX in a Flash™ is the Lean, Mean Asterisk Machine designed to meet the needs of hobbyists as well as business users and VARs. You'll have a high-performance turnkey Asterisk PBX that's easy to upgrade with dozens of add on scripts to provide virtually any feature you can imagine. With PIAF you can choose from tons of Nerd Vittles and FreePBX® applications that install in under 15 seconds: AsteriDex, Weather Reports, News Feeds, Email by Phone, Telephone Reminders, and many more."
- From pbxinaflash.com, Ward Mundy & Associates LLC (Google+).
PBX in a Flash (PIAF) is a free full-featured IP PBX server that bundles Asterisk, FreePBX and other apps. You can make cheap phone calls by integrating the PBX with a low-cost VoIP provider (such as Localphone). For example, integrating with an existing Google Voice account will enable free calling (via Wi-Fi/3G) to anywhere within the U.S. and Canada.
What's even better is that in IP PBX, calls between extensions are FREE! No matter where in the world you are, as long as you have Internet access. And generally you get good sound quality, too. With a suitable codec, you can even place and receive calls on 3G or make video calls.
If you haven't heard DigitalOcean before, they are a cloud computing provider where customers can deploy virtual private servers (VPS) for purposes such as web hosting and VoIP.
Note: If you like this article and want to support my site, please consider signing up using my referral links above.
The Challenge
The biggest challenge for installing PIAF on DigitalOcean is that there is NO easy way to mount the official ISO, and there are also NO pre-built templates like the official AMIs on Amazon EC2. However, despite the challenge, the installation could be done. Basically, the steps involve mounting the ISO via the "loop" device, adding the PIAF repo from ISO, use yum to install packages, and run post-install tasks.
I was inspired by the article How to install PBX in a Flash on your virtual server and this forum post by Joe, which I shall give credit. Those instructions were for an older version of PBX in a Flash, so I updated them here for the latest PIAF ISO version 2.0.6.5.
Create a DigitalOcean Droplet
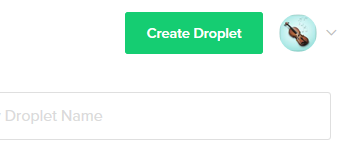
Start by creating a DigitalOcean droplet. Sign in to your DO account. From the web interface, click "Create Droplet":
Choose the CentOS 6 x64 image. Then select a droplet size and region:

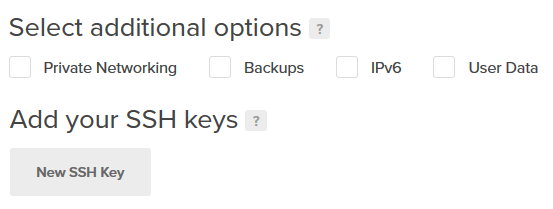
Next, configure additional droplet options to your needs. You may optionally add SSH keys for authentication, or receive the login details via e-mail.
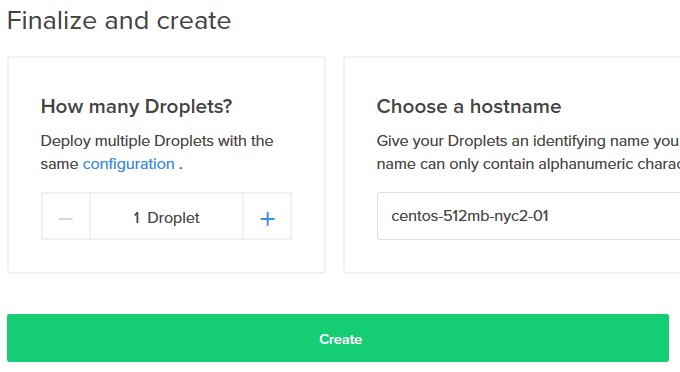
Finally, choose a hostname and click "Create":
After successful droplet creation, access it via SSH using a client such as PuTTY. Now let's begin the install process!
Installation Steps
DEPRECATION NOTICE: PBX in a Flash 3 is DEPRECATED as of 2017. Instructions in this article may no longer work. For the latest developments in PBX in a Flash, see the official website, PIAF@SourceForge and Nerd Vittles.
Note: Instructions have been updated for the latest PBX in a Flash 3. The step to download the 2.0.6.5 ISO is no longer needed!
First, install wget and nano:
yum -y install wget nano
Next, update your server's Linux kernel and reboot. Note for Linode users: Please enable GRUB and use a CentOS-provided kernel.
# (Recommended) Update all software including the kernel:
yum update
# Or, update the Linux kernel only:
yum update kernel
# DigitalOcean users should change kernel settings in the Control Panel,
# then power off the droplet and power it on again. Please see:
How to update a DigitalOcean server's kernel
# For Non-DigitalOcean servers, just reboot:
reboot
To avoid issues during PIAF install, SELinux must be disabled. Check the current status with sestatus. It should say:
# sestatus
SELinux status:   disabled
Otherwise, we need to disable it before proceeding:
setenforce 0
sed -i 's|SELINUX=enforcing|SELINUX=disabled|' /etc/selinux/config
Add the PIAF3 repository to yum configuration:
wget -qO- http://www.pbxinaflash.org/common/repos365.tgz | tar -xvz -C /etc/yum.repos.d
Use yum to install the required packages:
yum -y groupinstall additional-devel base cifs-file-server \
 compat-libraries console-internet core debugging development \
 mail-server ftp-server hardware-monitoring java-platform \
 legacy-unix mysql network-file-system-client network-tools php \
 performance perl-runtime security-tools server-platform \
 server-policy system-management system-admin-tools web-server

yum -y install uuid uuid-devel libuuid libuuid-devel uuid-c++

yum -y install kernel-devel php php-mysql php-gd php-mbstring \
 php-pear php-pear-db perl perl-libwww-perl perl-DateManip \
 perl-DBD-mysql perl-DBI perl-Net-DNS perl-suidperl perl-XML-Parser \
 audiofile-devel dhcp gd lm_sensors libusb-devel mysql-devel \
 gcc-c++ flite flite-devel automake xinetd tftp-server piafdl \
 piafxtras joe gtk2 gtk2-devel arts arts-devel esound-devel \
 jack-audio-connection-kit lcms libart_lgpl-devel libogg-devel \
 libvorbis-devel nas pulseaudio-libs SDL alsa-lib-devel libmng \
 libtool-ltdl libtool-ltdl-devel qt dialog coreutils sqlite-devel \
 libstdc++-devel tzdata ntp ntpdate php-process php-imap php-xml
Install the kernel source package that matches the running kernel:
yum -y install kernel-devel-`uname -r`
It is OK if you see "Package already installed". But if the above command fails with "No package available", try these additional steps.
Proceed with other install tasks. First we perform an NTP update:
/usr/sbin/ntpdate -su pool.ntp.org
Create directories and update various files. You can copy and paste these commands all at once, instead of one by one:
mkdir -p /etc/pbx
mkdir -p /etc/viaf
mkdir -p /etc/siaf
mkdir -p /etc/xiaf
mkdir -p /etc/yiaf
mkdir -p /etc/ciaf
mkdir -p /etc/fiaf
mkdir -p /etc/miaf
date --iso-8601=minutes > /etc/pbx/.installdate
date --iso-8601=minutes > /etc/viaf/.installdate
date --iso-8601=minutes > /etc/siaf/.installdate
date --iso-8601=minutes > /etc/xiaf/.installdate
date --iso-8601=minutes > /etc/yiaf/.installdate
date --iso-8601=minutes > /etc/ciaf/.installdate
date --iso-8601=minutes > /etc/fiaf/.installdate
date --iso-8601=minutes > /etc/miaf/.installdate
echo "3651" > /etc/pbx/.isoversion
echo "3651" > /etc/viaf/.isoversion
echo "3651" > /etc/siaf/.isoversion
echo "3651" > /etc/xiaf/.isoversion
echo "3651" > /etc/yiaf/.isoversion
echo "3651" > /etc/ciaf/.isoversion
echo "3651" > /etc/fiaf/.isoversion
echo "3651" > /etc/miaf/.isoversion
echo "UINO" > /etc/pbx/.installmethod
echo "UINO" > /etc/viaf/.installmethod
echo "UINO" > /etc/siaf/.installmethod
echo "UINO" > /etc/xiaf/.installmethod
echo "UINO" > /etc/yiaf/.installmethod
echo "UINO" > /etc/ciaf/.installmethod
echo "UINO" > /etc/fiaf/.installmethod
echo "UINO" > /etc/miaf/.installmethod
Use the following to work around a FreePBX bug due to PearDB:
pear channel-update pear.php.net
pear install -Z db-1.7.14
A few more commands to run:
\cp -f /usr/src/piafxtras/preinstallmenu/piafxtras-menu \
    /usr/local/sbin/piafxtras-menu
chmod +x /usr/local/sbin/piafxtras-menu
sed -i 's|Listen 9080|#Listen 9080|' /etc/httpd/conf/httpd.conf
rpm -e readahead
/usr/local/sbin/newparadigm.sh

# Note: Your "sshd_config" will be overwritten by the command above.
# DO NOT change SSH port yet - Default IPTables rules allow only port 22

# Skip these if using DigitalOcean (may be needed for other VPS):
# sed -i 's|quiet||' /boot/grub/grub.conf
# sed -i 's|rhgb||' /boot/grub/grub.conf
# sed -i 's/[ ]*$//' /boot/grub/grub.conf
# sed -i '/vmlinuz-2.6/ s|$| vga=791 |' /boot/grub/grub.conf
We use IPTables to work around an issue with PIAF mirrors:
sed -i '2i\ iptables -t nat -I OUTPUT -p tcp --dport 80 -d 192.210.137.132 -j DNAT --to-destination 198.23.161.166' /usr/local/sbin/newmenu
Finally, we restart the system:
reboot
Continue to PIAF Config Menu
After the reboot, SSH into your droplet. You will be greeted by the PBX in a Flash configuration menu:
*******************************************************
* Please make a selection A, B or C only!             *
* A = Continue with the installation of our products  *
* B = Load extra drivers for your hardware            *
* C = Command Line Interface                          *
*******************************************************
Press A. At the "select a program" screen, choose PBX in a Flash (PIAF). Next, you need to choose a PIAF "flavor". I recommend Green-PIAF.
You will then see the configuration wizard. Tap ENTER, choose No for the advanced configuration, then select and confirm your timezone, choose a FreePBX version (I recommend 2.11), and set or generate a secure password. Remember to write it down and store in a safe place! Go grab a cup of coffee, wait until the install process is complete and your droplet will automatically reboot. And Voila! You are done!
Set Up and Secure Your Server
Now that the install has finished, it is time to set up your Asterisk extensions and get going! Follow this guide from Nerd Vittles to get started. You can skip directly to the configuration instructions.
Incredible PBX 11 and Incredible Fax for PBX in a Flash 3
If you chose to install Green-PIAF, use this script to periodically update Asterisk to newer versions with security fixes. Before running the script, you may need to remove an empty folder with rmdir /etc/schmooze. For advanced users, learn how to enable SIP messaging and the Opus/VP8 codecs.
For choosing a VoIP client, I've had good experience with Zoiper (PC/Mac, Android, iPhone). Other clients I have used include CSipSimple and SipDroid.
To use Google Voice with your PBX, you may need to change this setting in your account. Also, check out my tutorial on how to get your call history with detailed minute usage.
Last but not least, don't forget to secure your new PIAF server from online attacks! I have written up a detailed guide right on this blog:
Securing Your Asterisk VoIP Server with IPTables
Disclaimer: I wrote this article as a hobby and I have NO affiliation with either the PBX in a Flash project or Ward Mundy & Associates LLC.
Please share this post if you like it, and do not hesitate to write your comments or questions in the Disqus form below.
Next article: Calculating Your Google Voice Minutes Usage with Ease
Previous article: Ghost Blog Auto Setup with Nginx and ModSecurity
Return to Lin's Tech Blog Homepage